Programming 101
Lecture List
- Programming_101:lecture_1: Introductions and the very-very basics.
Setup
Setting up Visual Studio Code
Use Matt's Guide to Contribution and Coding to set up Visual Studio Code and related plugins. Specifically, follow the first half of the second post. All the way up until it starts talking about the admin config.
Downloading the Base Project
The base code for this project is hosted on Github, accessible via this repository. A link to directly download the repository as a .zip file is here. To set up the project, unzip the folder onto your desktop or somewhere else. It can now be opened with Visual Studio Code: simply right click one of the internal folders (labelled "setX") and select "Open With Code".
Project Structure & Compiling
In Visual Studio Code, all projects should contain at least 3 files:
- world.dm - Do not touch this file for now, it does some background magic to make the setup work.
- course.dm - This is the file you should be modifying to make stuff work! It'll contain a function called /proc/main(), which is what you should modify to make stuff happen.
- course.dme - This is the DM Environment file for the project. It's basically what ties the entire project together and makes it able to compile.
After you've made any changes to the code, you have to press Ctrl-Shift-B to compile the code. Compilation is required to produce the .dmb file which we will be hosting with DreamDaemon.
Hosting
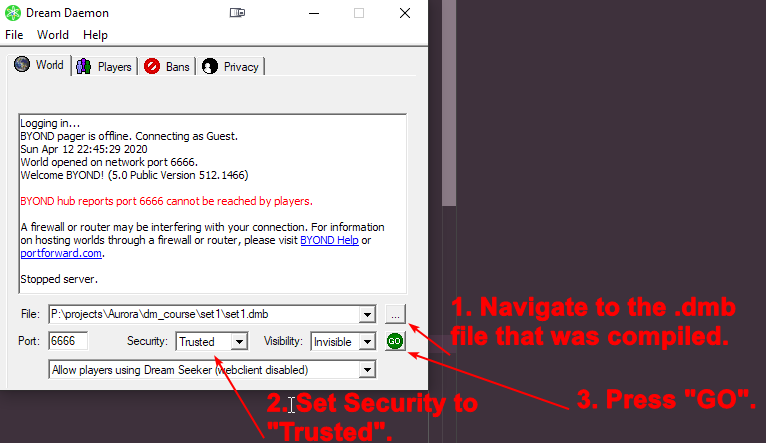
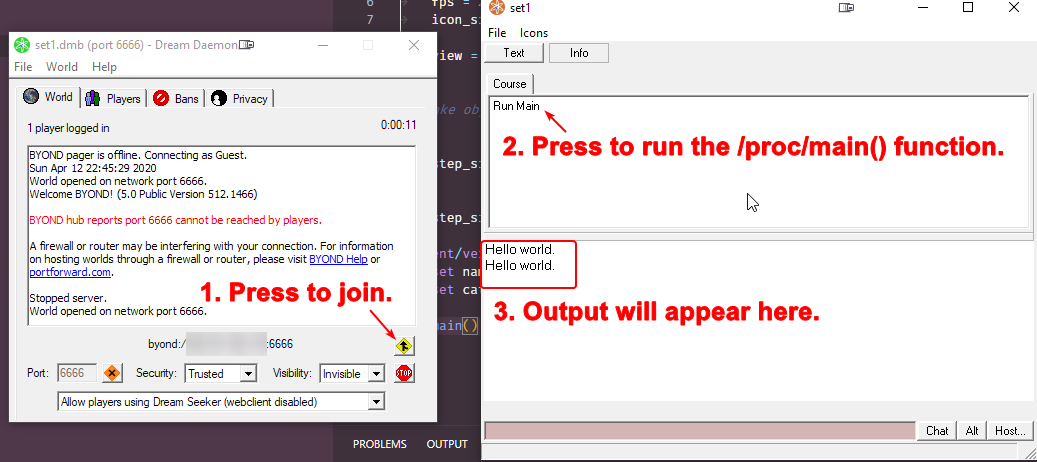
After compilation, we need to host the project to join and see what our code does!
This is done using a program called DreamDaemon. It's installed in your program files, right besides DreamMaker.exe and BYOND.exe. Find it, open it. And then follow the pictorial guide to success:
Helpful Resources
Here's a list of helpful resources for programming DM specifically:

